How to implement cookie blocking with Iubenda
The aim of this guide is to help you to setup and install the iuebenda cookie solution on your website, connected to Google Tag Manager, with Prior Blocking in place.
Note: Before following this guide, please ensure you have setup the iubenda tags in Google Tag Manager. We have an easy-to-follow guide on how to do that here.
If you have built your website using WordPress, there is an official plugin you can use to add your iubenda services to your website. Take a look at this guide for help with setting that up.
What is Prior Blocking
The General Data Protection Regulation (GDPR) requires websites to obtain informed consent from users before using cookies that are not essential for the website’s basic functioning. Prior blocking ensures that users have control over their personal information by allowing them to decide whether or not they want non-essential cookies to be placed on their devices.
Find your iubenda embed code
The first step is to locate the code that is provided in your iubenda dashboard that will show your cookie banner on your website.
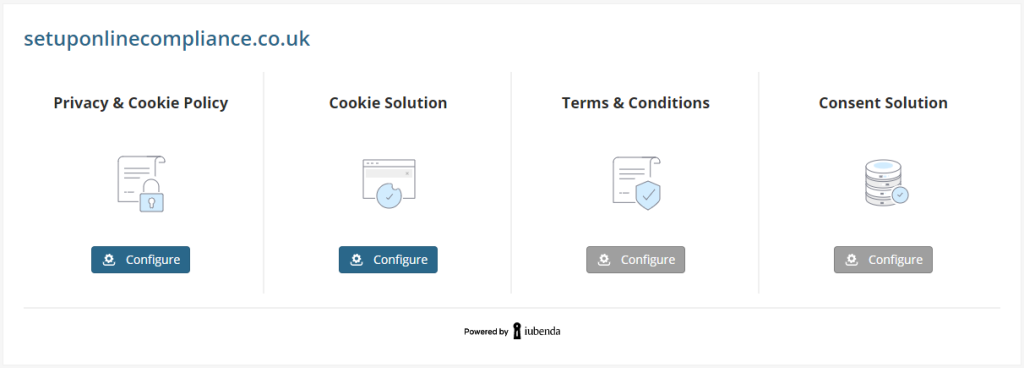
Log into your iubenda dashboard by clicking on your domain in your Online Control Panel and then clicking ‘Manage’ in the Online Compliance section.

Next, click ‘Configure’ under the Cookie Solution product:

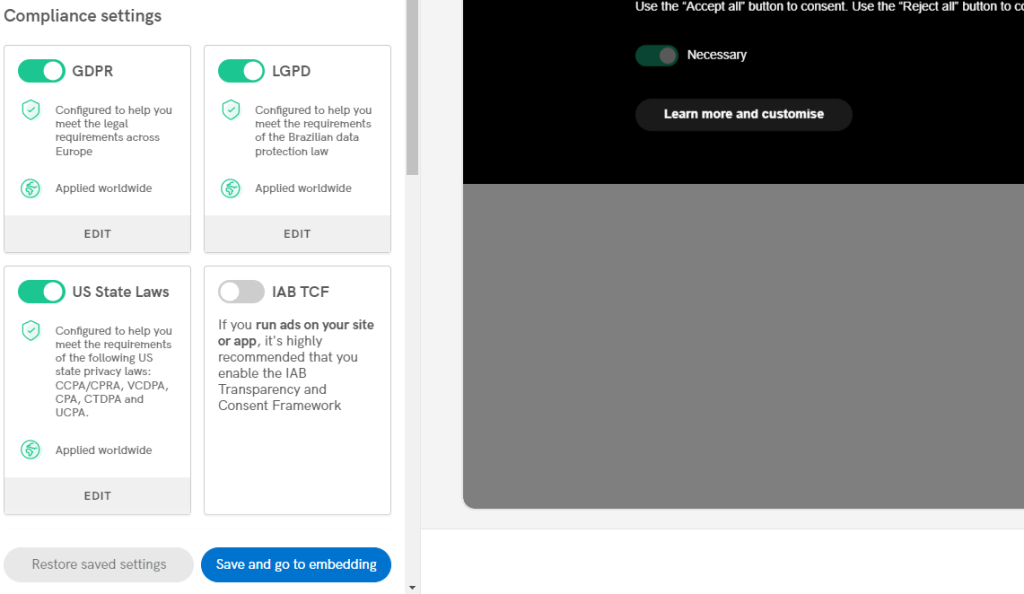
Make sure you have your required policies active and click the ‘Save and go to embedding’ button:

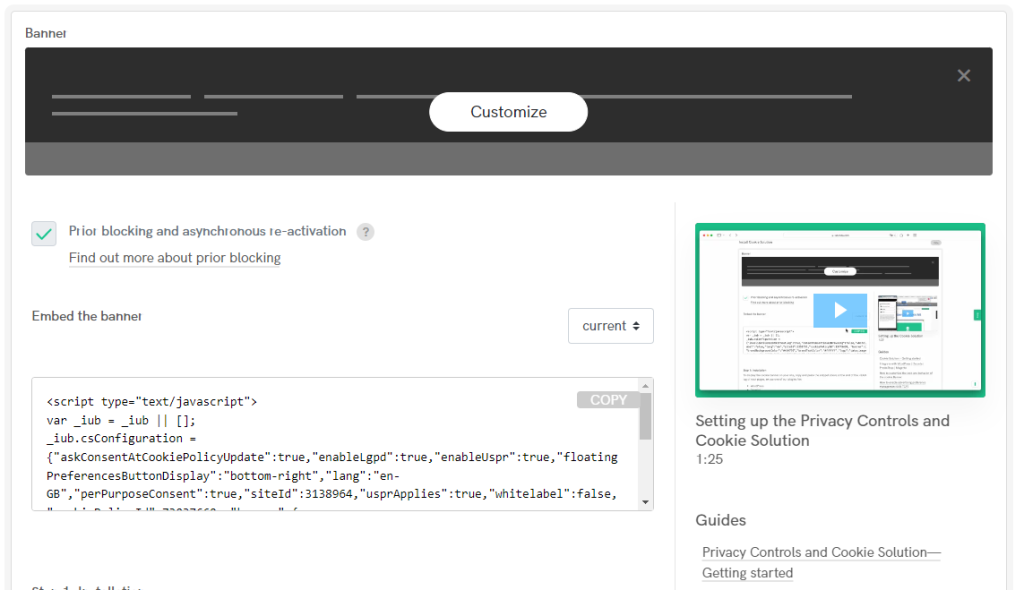
Copy the code in the text box, by clicking the grey ‘COPY’ button:

Amending the code to work with Google Tag Manager
You will need to add a few lines of text to the code you have copied, to make sure that the tags you have setup only activate when the visitor gives their consent. Take the text you have copied in the previous step and paste it into a text editor of your choice for example Notepad, Word or Google Documents. The code you have copied should look something like the following:
<script type="text/javascript">
	var _iub = _iub || [];
	_iub.csConfiguration = {
	"askConsentAtCookiePolicyUpdate":true,
	"enableLgpd":true,
	"enableUspr":true,
	"floatingPreferencesButtonDisplay":"bottom-right","lang":"en-GB","perPurposeConsent":true,
	"siteId":3138964,
	"usprApplies":true,
	"whitelabel":false,
	"cookiePolicyId":73037660,
	"banner":{
		"acceptButtonDisplay":true,
		"backgroundOverlay":true,
		"closeButtonDisplay":false,
		"customizeButtonDisplay":true,
		"explicitWithdrawal":true,
		"listPurposes":true,
		"rejectButtonDisplay":true,
		"showPurposesToggles":true
			}
	};
</script>
<script type="text/javascript" src="//cdn.iubenda.com/cs/gpp/stub.js"></script>
<script type="text/javascript" src="//cdn.iubenda.com/cs/iubenda_cs.js" charset="UTF-8" async></script>
Now, copy the code below, including the initial ” , “
,
        "callback": {
            onPreferenceExpressedOrNotNeeded: function(preference) {
                dataLayer.push({
                    iubenda_ccpa_opted_out: _iub.cs.api.isCcpaOptedOut()
                });
                if (!preference) {
                    dataLayer.push({
                        event: "iubenda_preference_not_needed"
                    });
                } else {
                    if (preference.consent === true) {
                        dataLayer.push({
                            event: "iubenda_consent_given"
                        });
                    } else if (preference.consent === false) {
                        dataLayer.push({
                            event: "iubenda_consent_rejected"
                        });
                    } else if (preference.purposes) {
                        for (var purposeId in preference.purposes) {
                            if (preference.purposes[purposeId]) {
                                dataLayer.push({
                                    event: "iubenda_consent_given_purpose_" + purposeId
                                });
                            }
                        }
                    }
                }
            }
        }
Paste the copied code into your original code, at the point we have shown in the screenshot below:

You should now have a full set of code that looks like the following:
<script type="text/javascript">
	var _iub = _iub || [];
	_iub.csConfiguration = {
		"askConsentAtCookiePolicyUpdate":true,
	"enableLgpd":true,
	"enableUspr":true,
	"floatingPreferencesButtonDisplay":"bottom-right","lang":"en-GB","perPurposeConsent":true,
	"siteId":3138964,
	"usprApplies":true,
	"whitelabel":false,
	"cookiePolicyId":73037660,
	"banner":{
		"acceptButtonDisplay":true,
		"backgroundOverlay":true,
		"closeButtonDisplay":false,
		"customizeButtonDisplay":true,
		"explicitWithdrawal":true,
		"listPurposes":true,
		"rejectButtonDisplay":true,
		"showPurposesToggles":true
			},
        "callback": {
            onPreferenceExpressedOrNotNeeded: function(preference) {
                dataLayer.push({
                    iubenda_ccpa_opted_out: _iub.cs.api.isCcpaOptedOut()
                });
                if (!preference) {
                    dataLayer.push({
                        event: "iubenda_preference_not_needed"
                    });
                } else {
                    if (preference.consent === true) {
                        dataLayer.push({
                            event: "iubenda_consent_given"
                        });
                    } else if (preference.consent === false) {
                        dataLayer.push({
                            event: "iubenda_consent_rejected"
                        });
                    } else if (preference.purposes) {
                        for (var purposeId in preference.purposes) {
                            if (preference.purposes[purposeId]) {
                                dataLayer.push({
                                    event: "iubenda_consent_given_purpose_" + purposeId
                                });
                            }
                        }
                    }
                }
            }
        }
	};
</script>
<script type="text/javascript" src="//cdn.iubenda.com/cs/gpp/stub.js"></script>
<script type="text/javascript" src="//cdn.iubenda.com/cs/iubenda_cs.js" charset="UTF-8" async></script>
Now that you have adapted the code for the integration with Google Tag Manager, you will need to copy it into your website pages, before the closing of the BODY tag.
Note: If you are using Website Builder, we have a guide here that will help you add the code to your website.
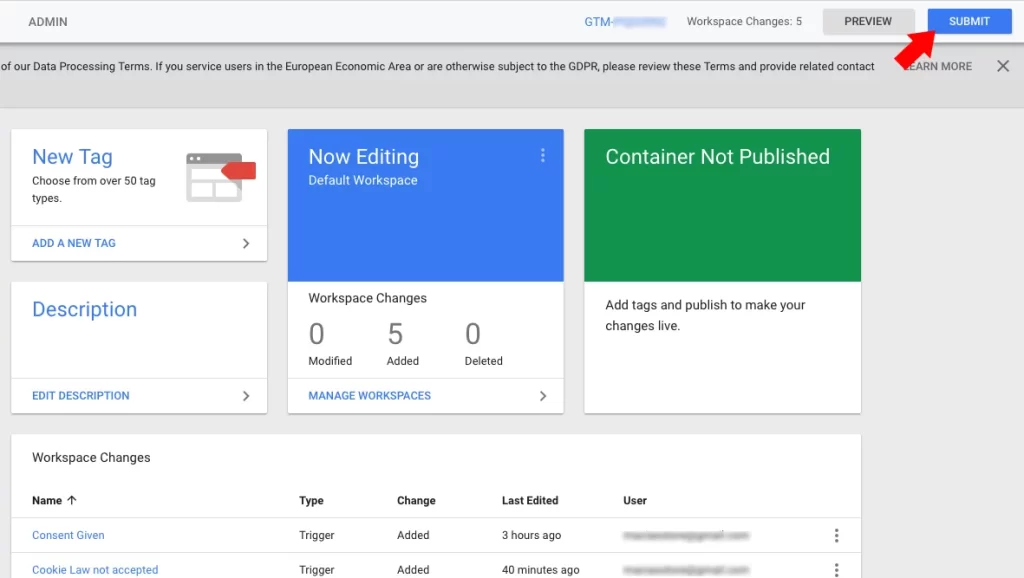
When you are ready, publish the tags and triggers that you’ve created in Google Tag Manager to make them live on your website.

Summary
You have now linked the iubenda Cookie solution to your Google Tag Manager tags and triggers and have installed the cookie banner your website with Prior Blocking activated. The tag you have created will not be activated until the visitor agrees to the use of cookies, or if GDPR does not apply to them.
Next Steps
Your next step will be to add any additional tags that you require in Google Tag Manager and ensure they use the iubenda triggers that you’ve setup. Remember to resubmit them to make them live.
If you have any questions, please raise a support request from within your Online Control Panel or call us on 0345 363 3634 and our customer support team will be happy to help.