How to update your hosts file
This article will demonstrate how you can update your Hosts file on both Windows and Mac to preview your site before making any DNS changes.
Changing the local hosts file on your computer is an extremely useful tool that will allow you to view your website hosted on a specific server address, without the need to update the DNS for the domain. This is particularly useful when migrating your site from one provider to another, as you will be able to view the new website on your computer, whilst everybody else will still see the old website.
Firstly, you will need to open the application Notepad as an Administrator.
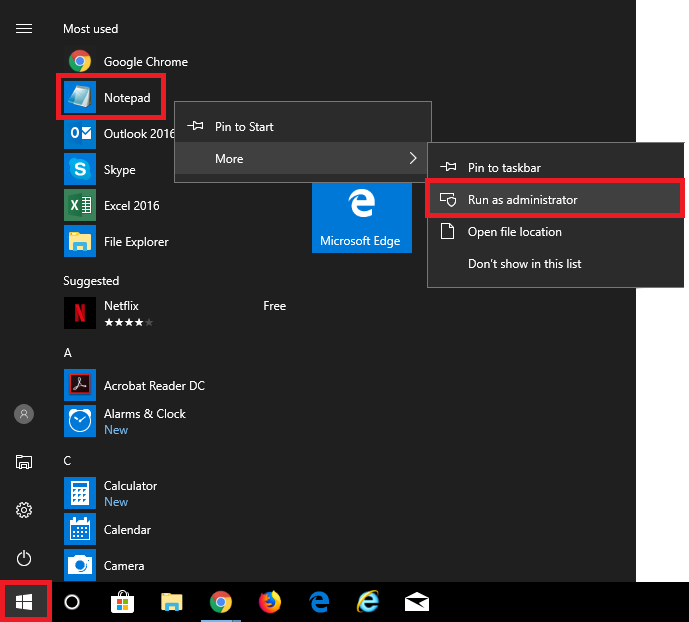
Next you will need to click File > Open.
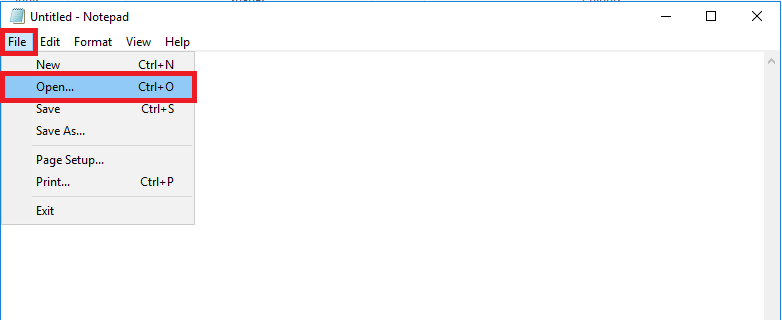
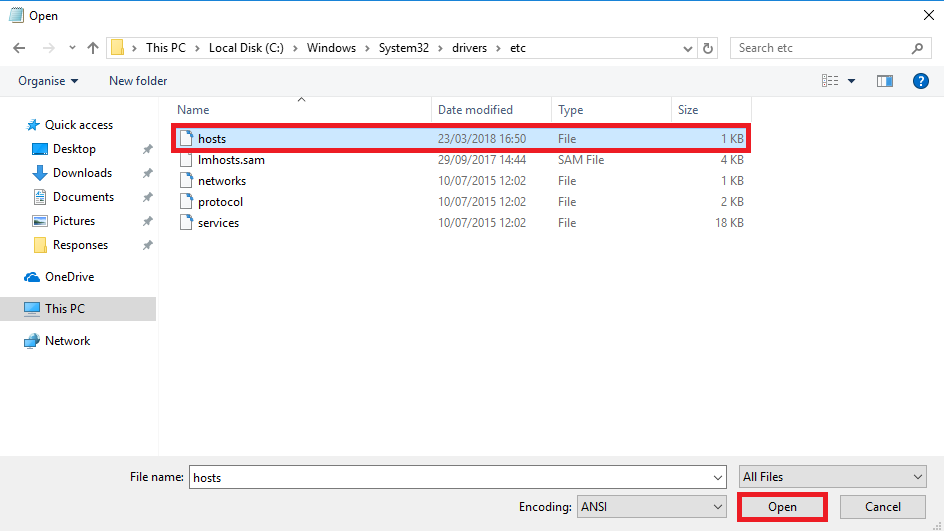
At the top of the window, search for C:\Windows\System32\drivers\etc and hit Enter on your keyboard.
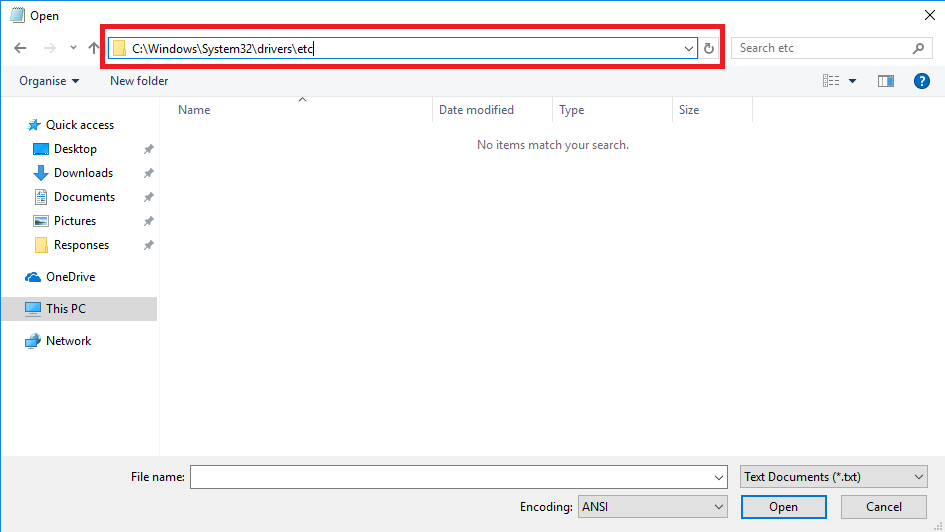
Then change the displayed file types from Text Documents to All Files.
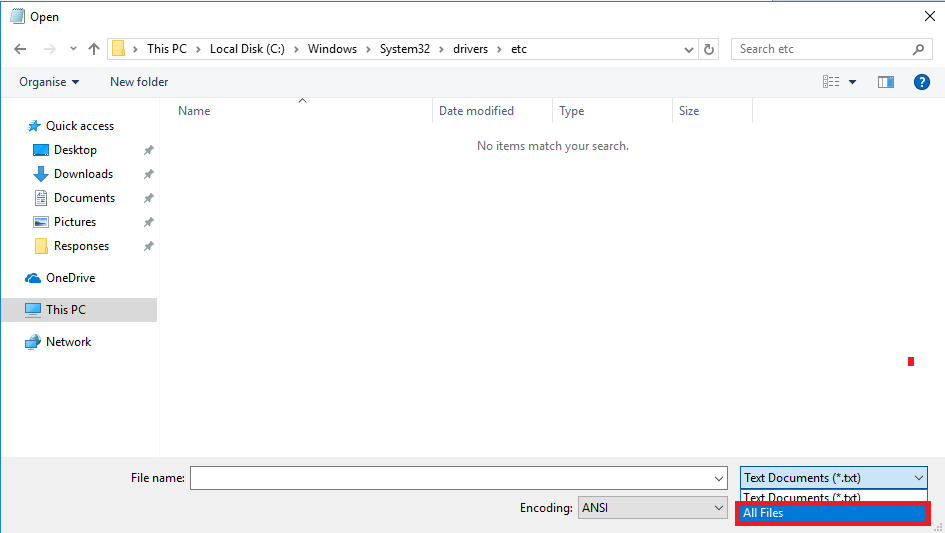
Click on the file called Hosts, and then click Open.
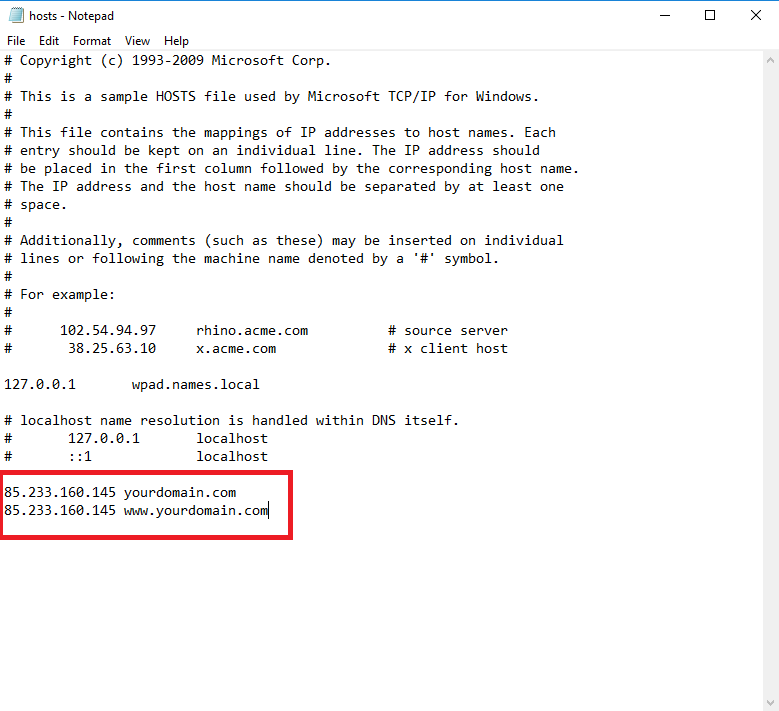
Underneath all of the text in the file, simply enter the IP address for your hosting followed by the name of your website.
Apache – Use 85.233.160.145
cPanel – Use your cPanel IP address
Windows – Use 81.88.60.34
We would recommend that you enter two separate lines for both your primary domain and your www subdomain, as shown below.
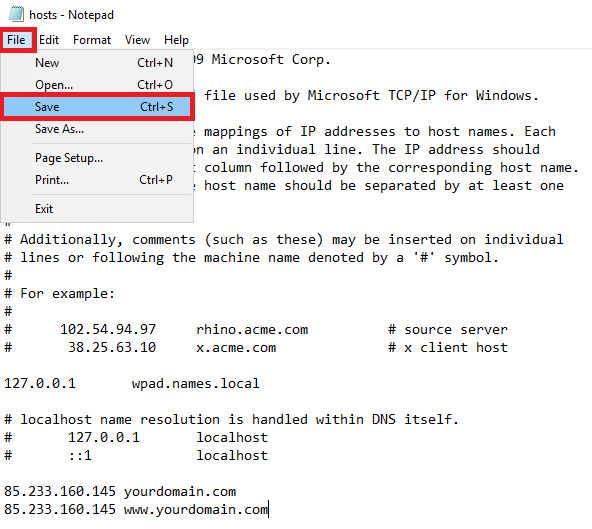
Once you have applied the correct changes, click File and Save.

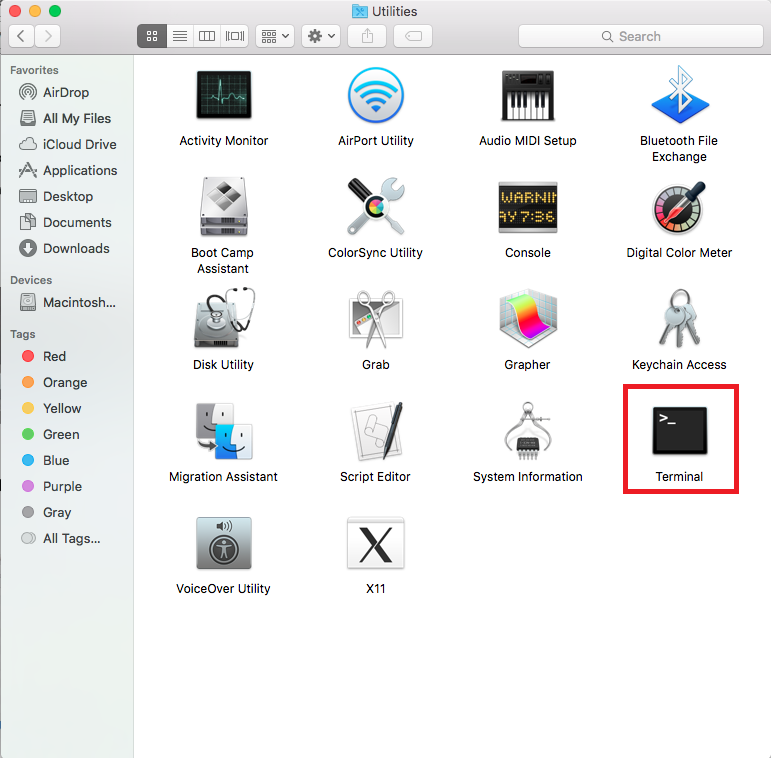
Within a new Finder window, click on Applications and then double click on the Utilities folder.
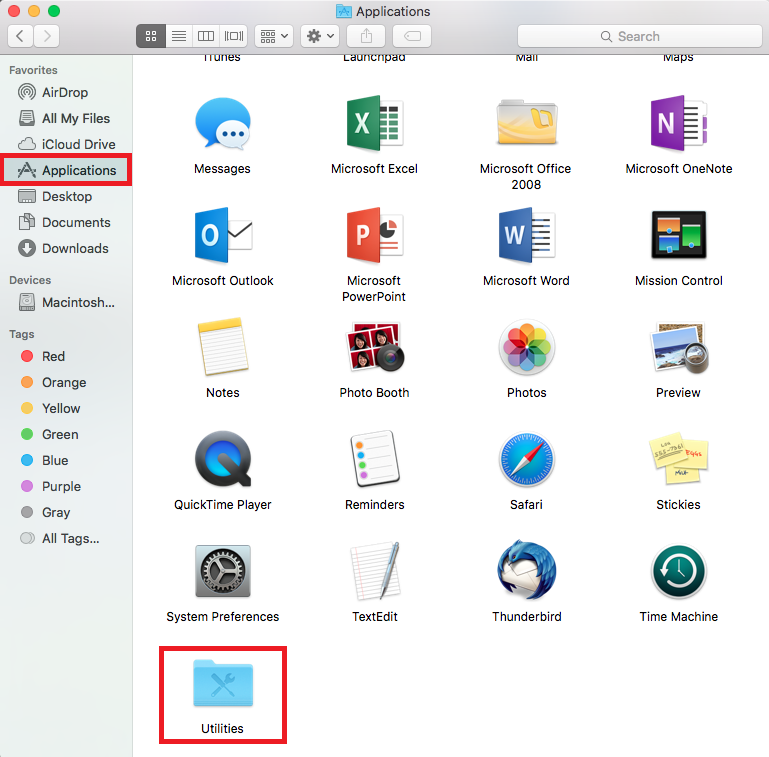
Next, double click on Terminal.
Within Terminal, enter the following command:
sudo nano /etc/hosts
and hit return on your keyboard.
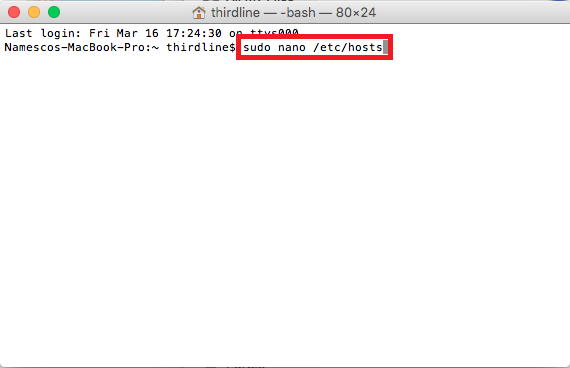
You will then need to enter your Mac’s Administrator Password, and hit return.

Underneath all of the text in the file, simply enter the IP address for your hosting followed by the name of your website.
Apache – Use 85.233.160.145
cPanel – Use your cPanel IP address
Windows – Use 81.88.60.34
We would recommend that you enter two separate lines for both your primary domain and your www subdomain, as shown below.
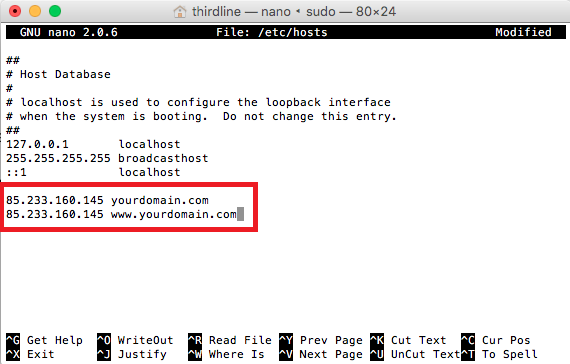
In order to save the file, hold control and O on your keyboard.