How To Add a SimplyBook Widget to Your Own Website
In this article, we will guide you through creating and adding a variety of SimplyBook widgets to your website. Adding a booking widget to your website is a great way to streamline appointment scheduling and improve user experience. By offering a seamless booking process, you can increase conversions, save time, and enhance customer satisfaction.
How to Create an iFrame Widget
An iframe widget is a small application or feature embedded within a webpage using an <iframe> (inline frame) HTML element. It allows you to display external content—such as booking forms, maps, videos, or social media feeds—directly on your website without requiring users to leave the page.
Step One
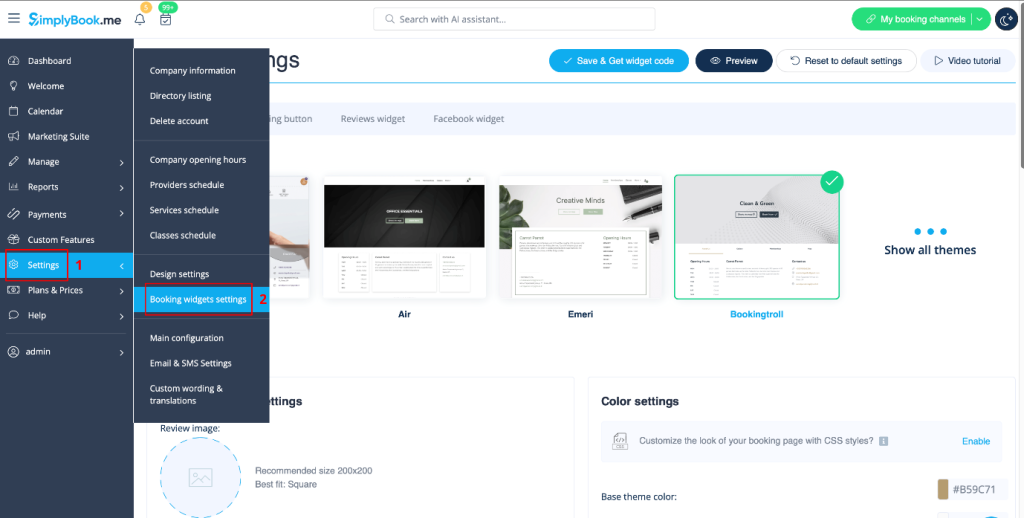
To begin, you can find the iFrame code for your booking page by navigating to Settings, then Booking Widgets Settings.

Step Two
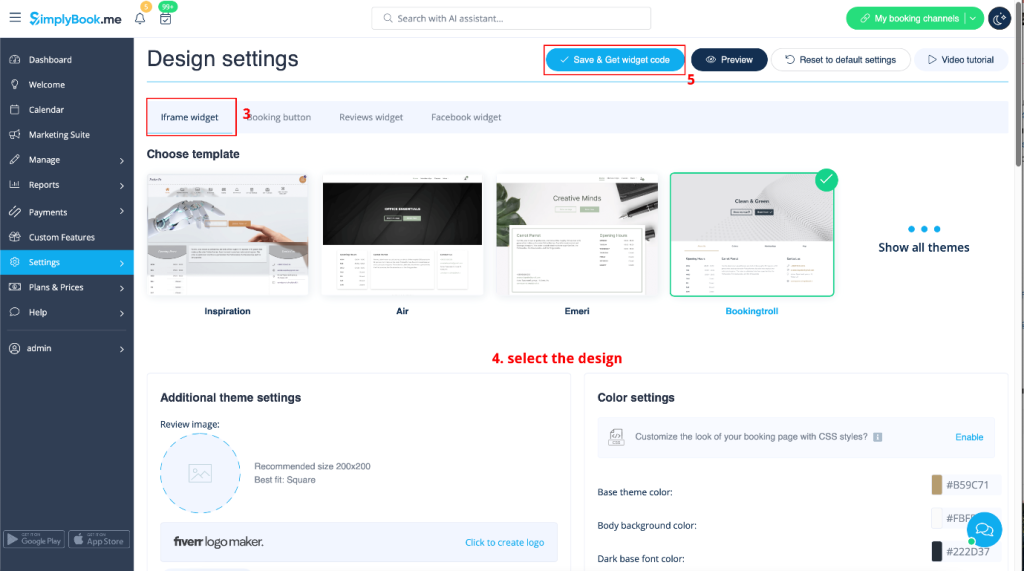
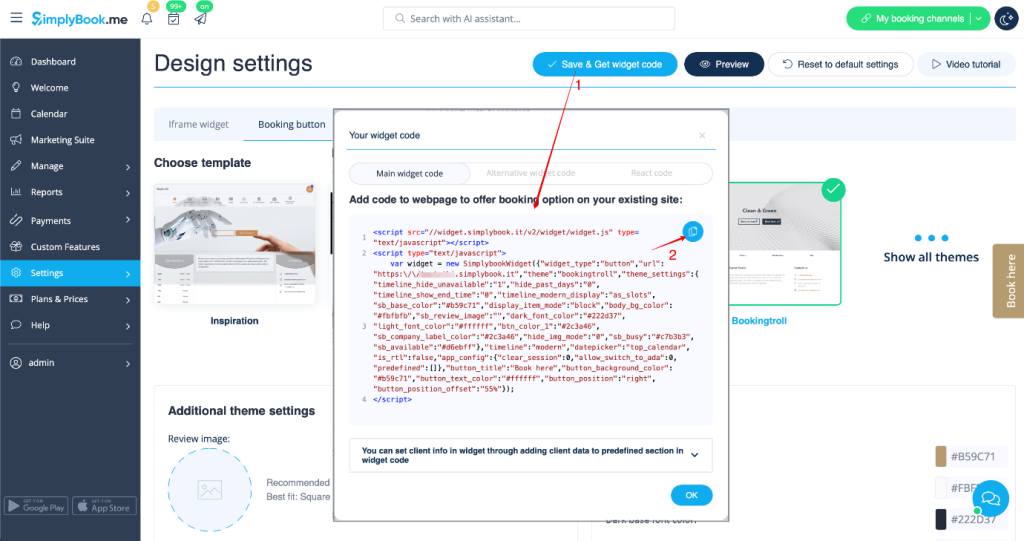
On the page you are taken to, select iFrame Widget. Here, you can choose a widget design and tailor it to your preferences. Once you have finished designing the widget, select Save & Get widget code in blue near the top of the page.
Step Three
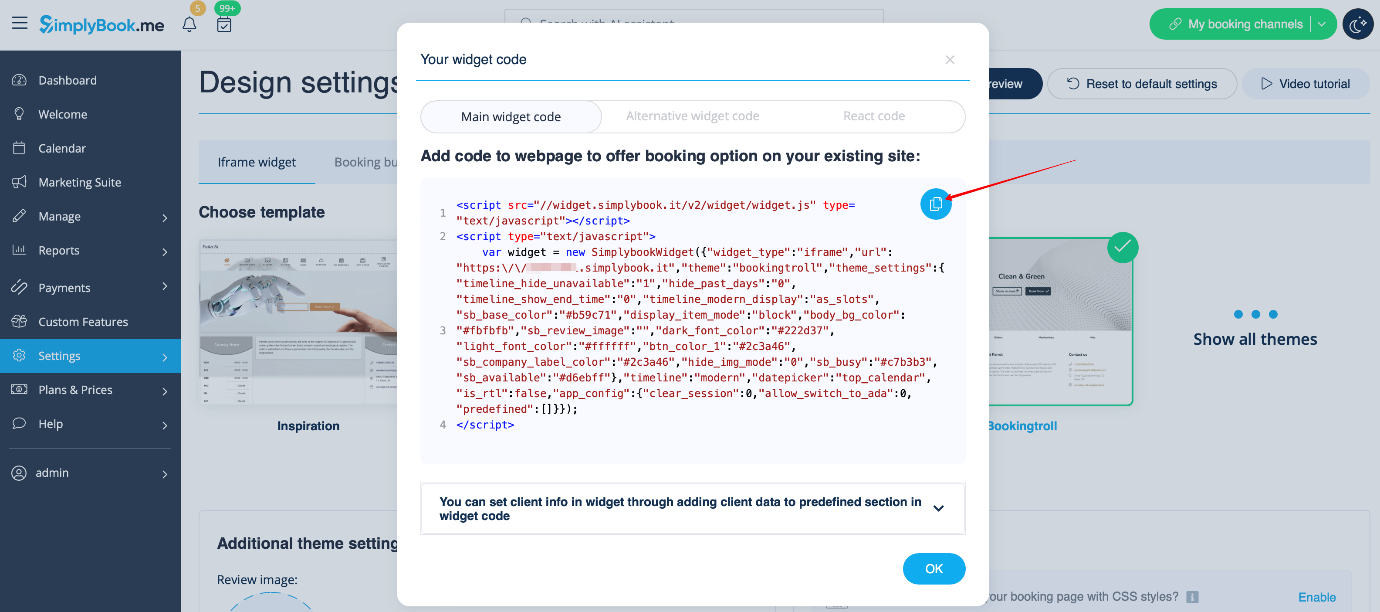
In the window that appears, you can then copy the code by selecting the Copy button.
Once copied, you can insert it into the <body> section of your website’s HTML or any designated area on your website platform for adding HTML JavaScript iFrame code.
NOTE: Different website builders and platforms may have different methods for adding HTML code. Be sure to check if your website supports inserting HTML JavaScript code.
How to Create Widgets with a Predefined Service, Provider, Category or Location
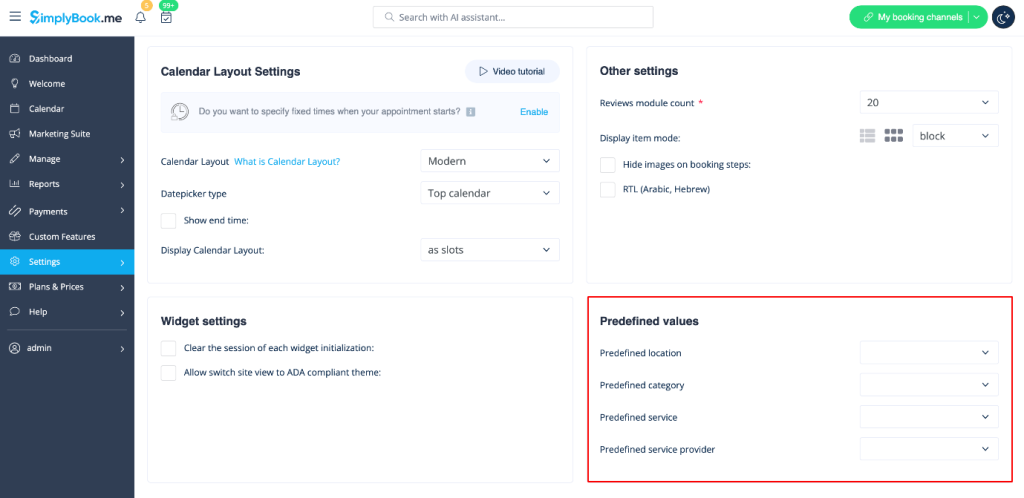
This feature lets you generate iFrame code for a specific service, provider, category, or location. For example, if you offer two services, A and B, and set service A as predefined, the widget will open directly on that service, skipping the selection step. This can be useful for displaying only certain services on specific pages of your website. The code generation process remains the same—simply select the item you want to predefine in the widget settings.
How to Create Widgets with Predefined Client Details
You can now create a widget for a specific client with their details pre-filled.
Step One
To begin, choose the widget type in Settings < Booking Widgets Settings. Here, you can customize the design, then select Save & Get Widget Code.
Step Two
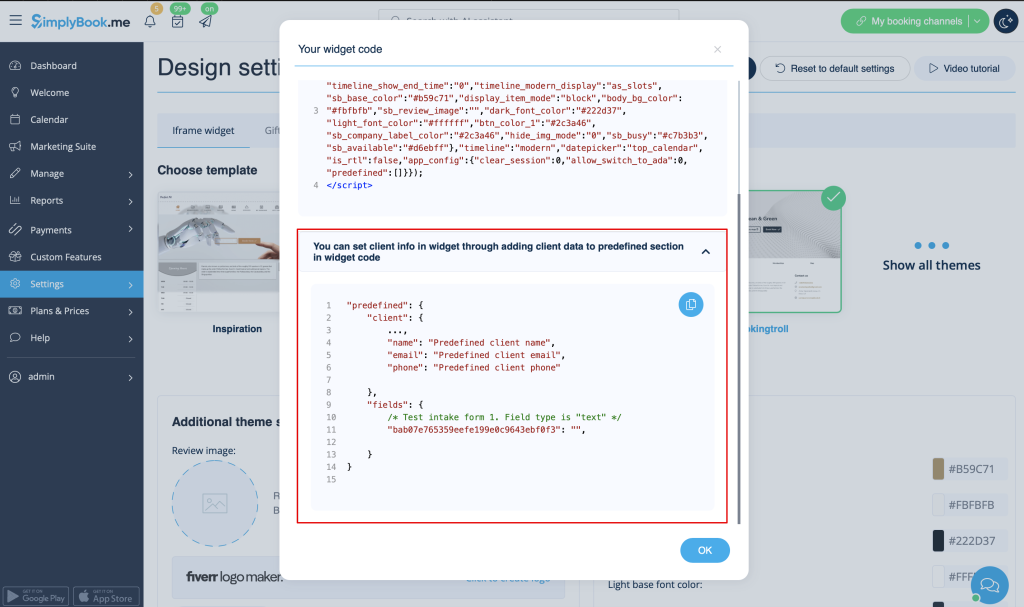
A pop-up window will appear with the code. Click on the bottom section to access the client code details.
Copy the main code, add the bottom section to the predefined section, and replace Predefined client name, Predefined client email, and Predefined client phone with the relevant client details.
Step Three
Once completed, a code block will be generated for you.
<script src="//simplybook.me/v2/widget/widget.js"></script> <script>var widget = new SimplybookWidget({"widget_type":"iframe","url":"https:\/\/companyname.simplybook.me","theme":"belle","theme_settings":{"sb_base_color":"#FF6969","body_bg_color":"#ffffff","dark_font_color":"#494949","light_font_color":"#ffffff","sb_busy":"#dad2ce","sb_available":"#d3e0f1"},"timeline":"flexible","datepicker":"top_calendar","is_rtl":false,"app_config":{"predefined": {"client": {
"name": "Mary",
"email": "mary@gmail.com",
"phone": "+1234567890"
}} }});</script>
Step Four
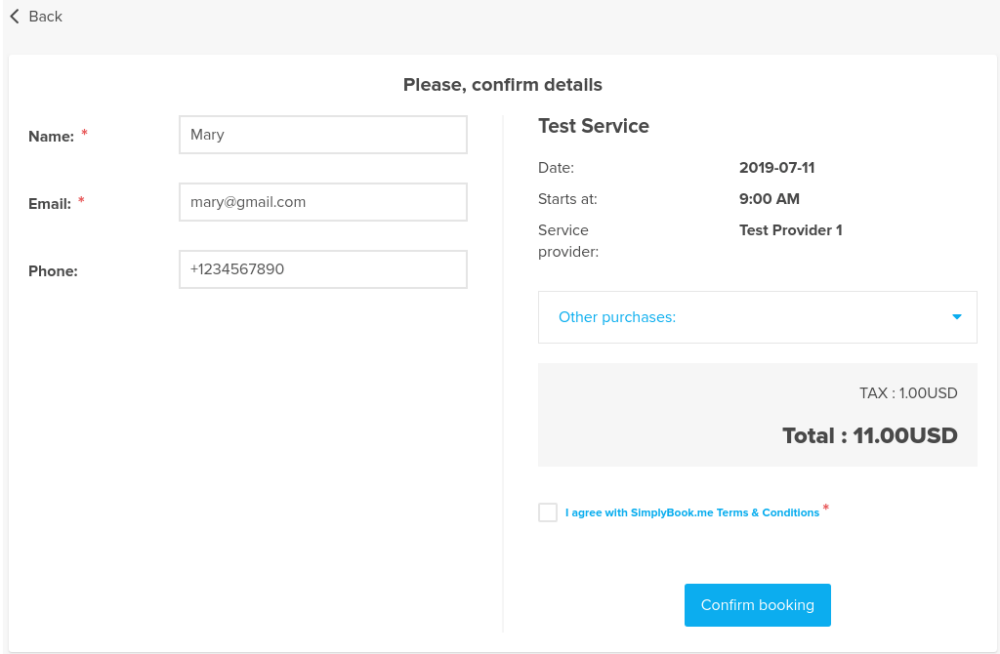
This will automatically pre-fill the client’s details in the widget, so they won’t need to enter them manually.
How to Create Widgets for Client Login, Packages, Memberships and Gift Cards
NOTE: This feature is only currently compatible with iFrame widgets and does not work with booking button or contact button widgets.
If you are using one or more of these features, you may need to add a widget that enables your clients to access the option on your website.
This can be easily done by adding the corresponding “navigate” element to the widget code.
- Client Login
"navigate":"client/sign-in" - Packages
"navigate":"packages" - Memberships
"navigate":"membership" - Gift Cards
"navigate":"gift-card" How to Create a Booking Button Widget
Step One
To begin, choose the widget type in Settings < Booking Widgets Settings.

Step Two
Select Booking button.
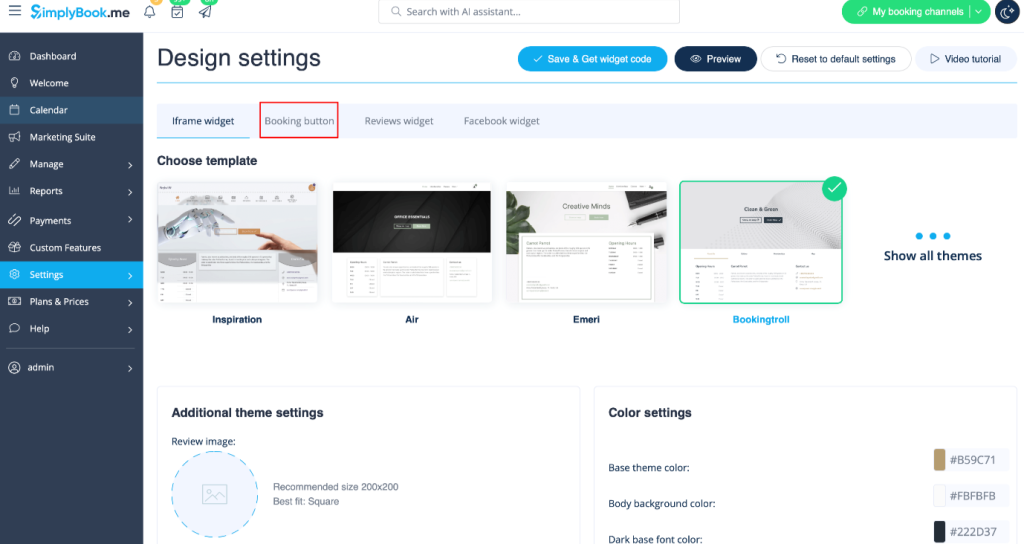
Step Three
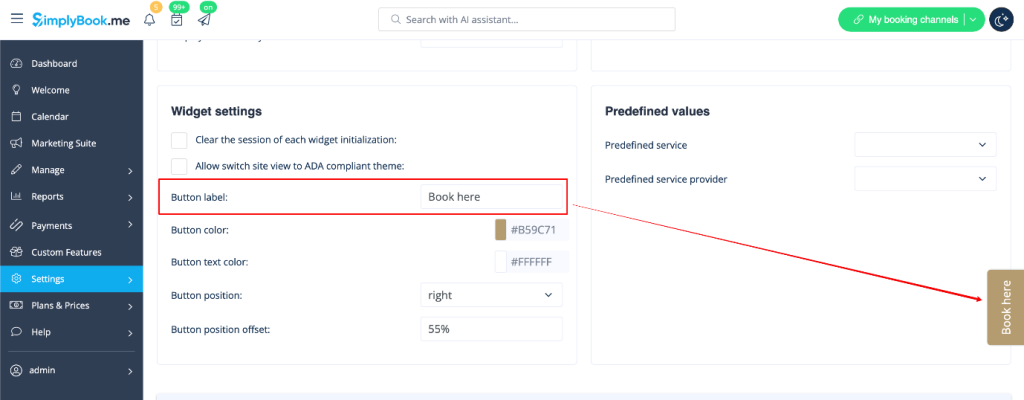
Here, you can choose a widget design and tailor it to your preferences.
Once you have finished designing the widget, select Save & Get widget code in blue near the top of the page.
Step Four
In the window that appears, you can then copy the code by selecting the Copy button.
Once copied, you can insert it into the <body> section of your website’s HTML or any designated area on your website platform for adding HTML JavaScript iFrame code.
NOTE: Different website builders and platforms may have different methods for adding HTML code. Be sure to check if your website supports inserting HTML JavaScript code.
How to Create a Booking and Contact Button Widget
Step One
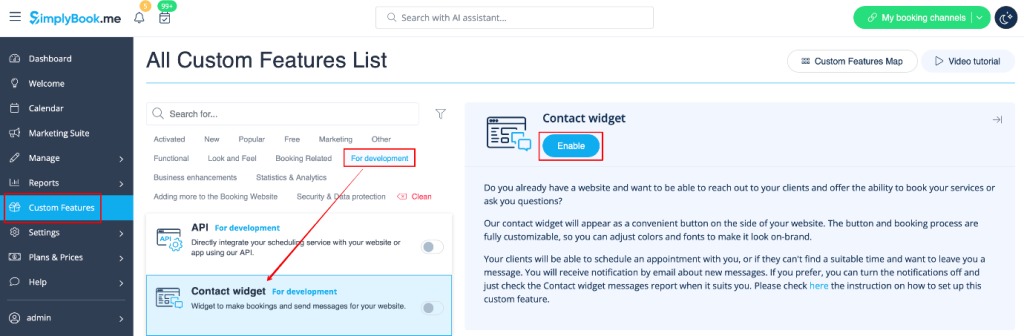
To begin, navigate to Custom Features < For development, then select Contact widget < Enable.
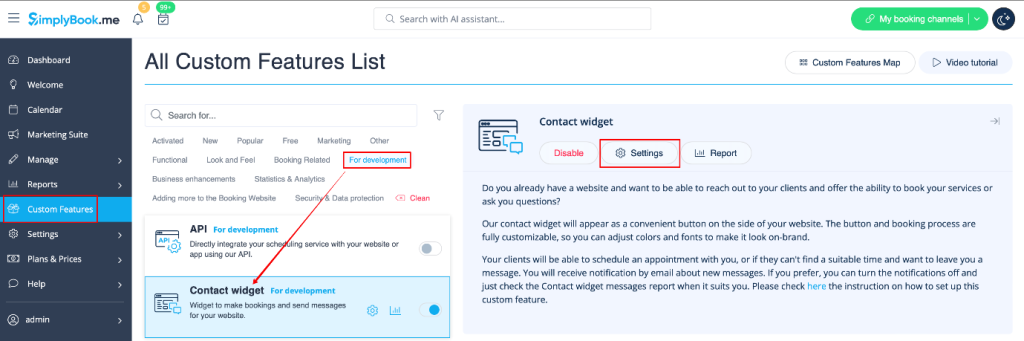
Once enabled, click Settings on the right of your page.
Step Two
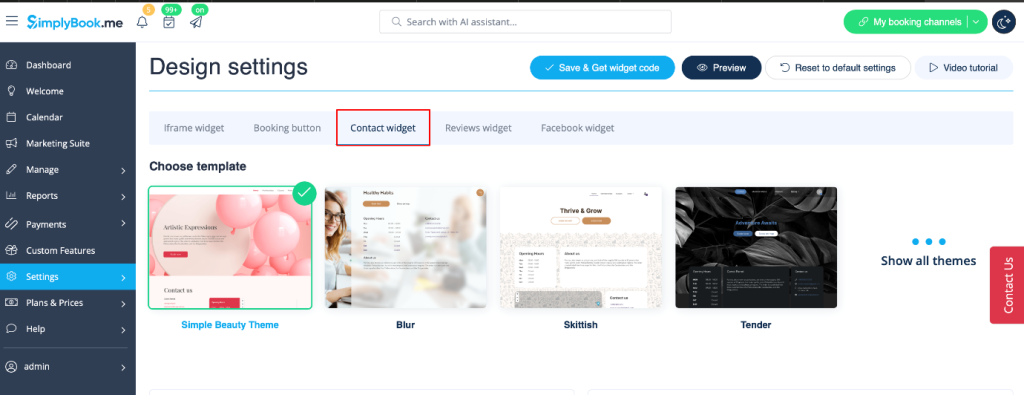
On the page you are taken to, select Contact widget. Here, you can choose a widget design and tailor it to your preferences.
Step Three
Once you have finished designing the widget, select Save & Get widget code in blue near the top of the page. In the window that appears, you can then copy the code by selecting the Copy button.

Step Four
Once copied, you can insert it into the <body> section of your website’s HTML or any designated area on your website platform for adding HTML JavaScript iFrame code.
NOTE: Different website builders and platforms may have different methods for adding HTML code. Be sure to check if your website supports inserting HTML JavaScript code.
How to Create a Reviews Widget
Step One
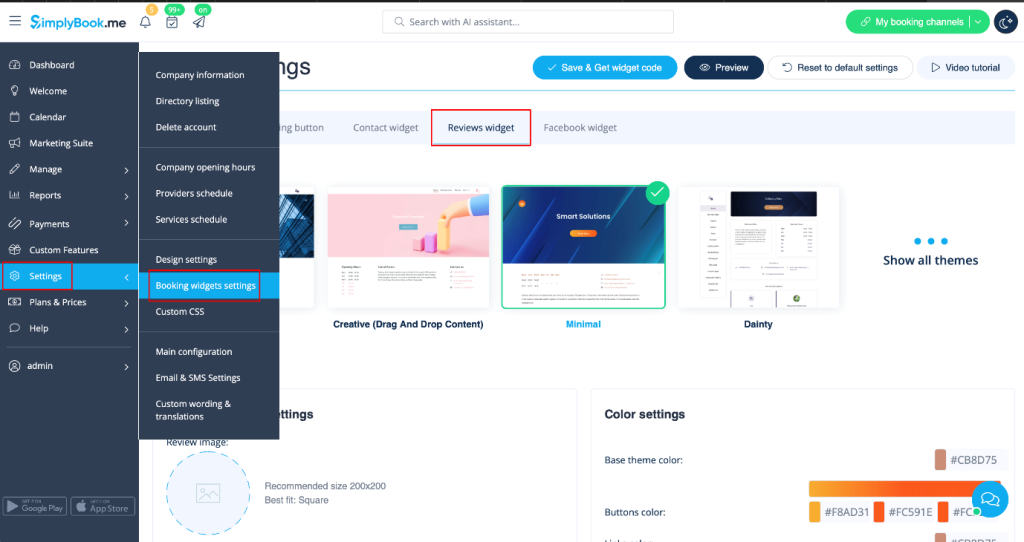
To begin, choose the widget type in Settings < Booking Widgets Settings. On the page you are taken to, select Reviews widget.
Step Two
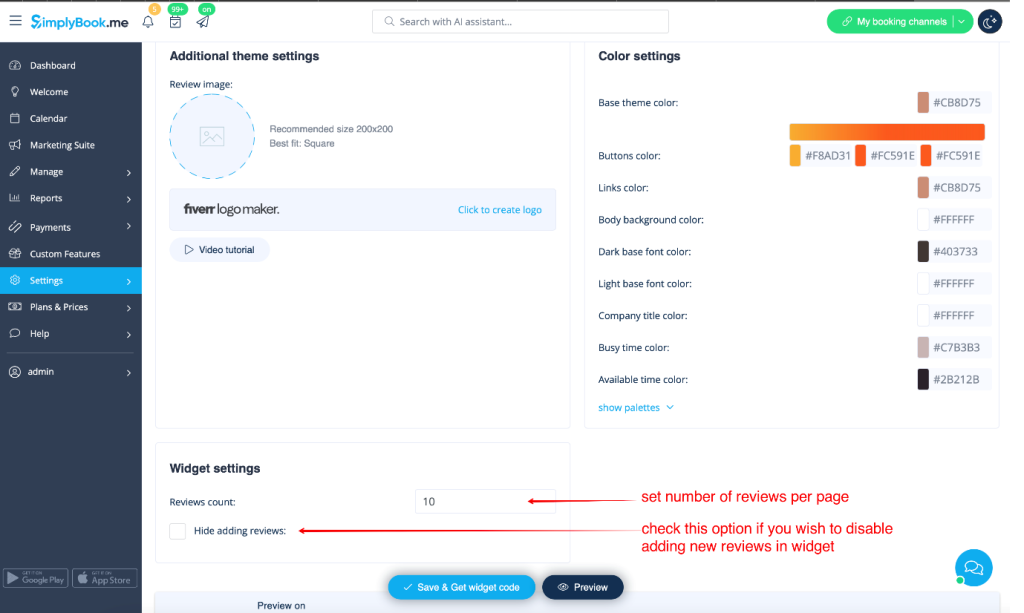
On the page you are taken to, you can choose a theme, customise colours, set the number of reviews to display, and decide whether clients can submit reviews through the widget.
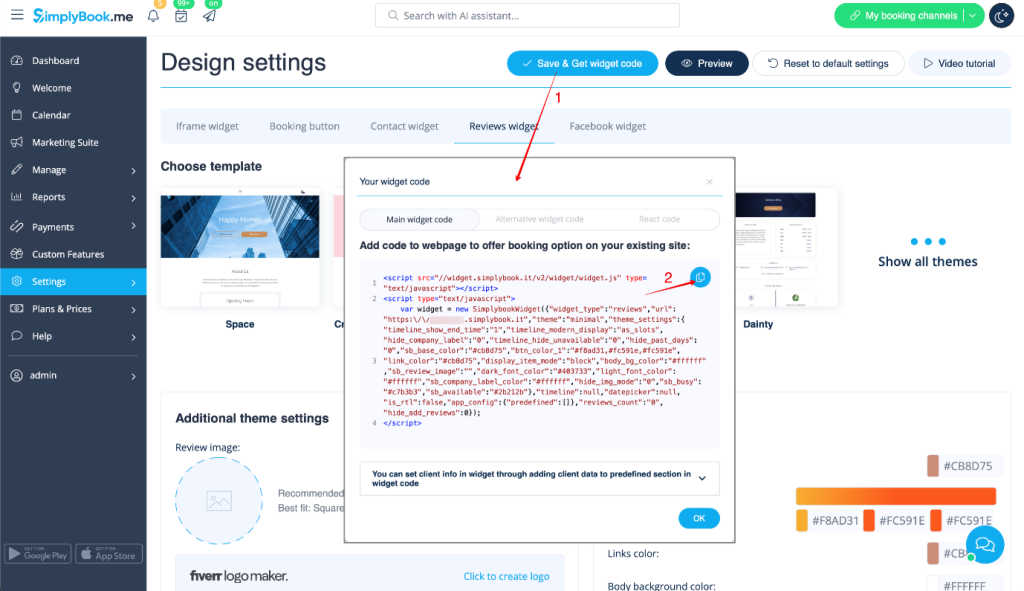
Step Three
Once the design is set, simply click the Get Widget Code button, copy the code, and insert it into your website at the desired location.
If you have any further questions, simply raise a support request from within your Online Control Panel or call us on 0345 363 3634. Our Support team are here to help and ready to assist you with your enquiry.
For assistance raising a support request please follow the following guide.