How to Install an External SSL Certificate
In this article, we will show you how to install an external SSL certificate in WePanel. This is essential for securing your website and ensuring encrypted communication between your server and visitors.
Getting Started
To get started, you first need to log into the WePanel through your Online Control Panel. Unsure how to do so? Follow our guide HERE
Step One
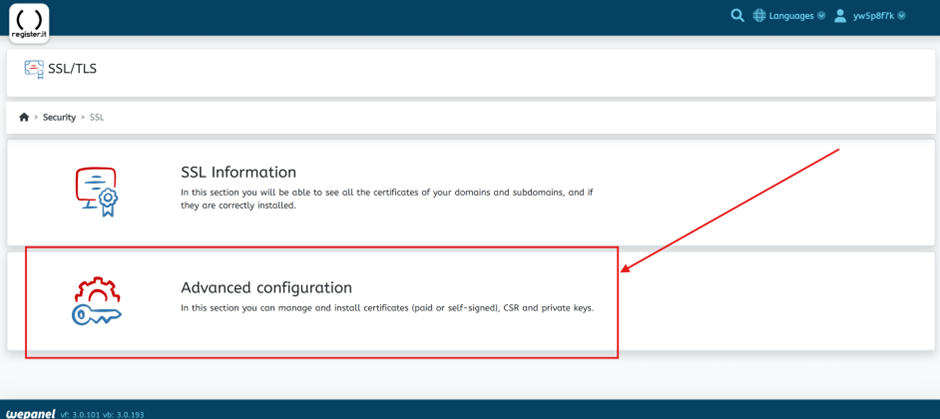
In your WePanel, go to Security and select the SSL/TLS panel.

Step Two
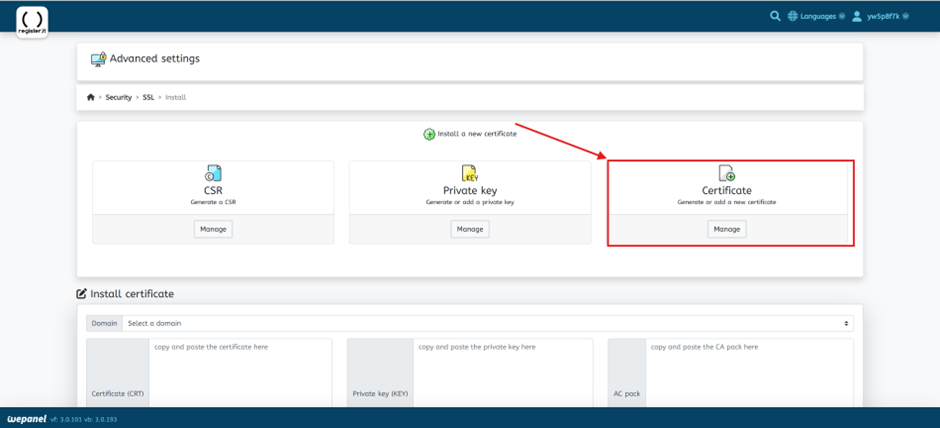
Click Advanced configuration to access advanced SSL configuration options.
Step Three
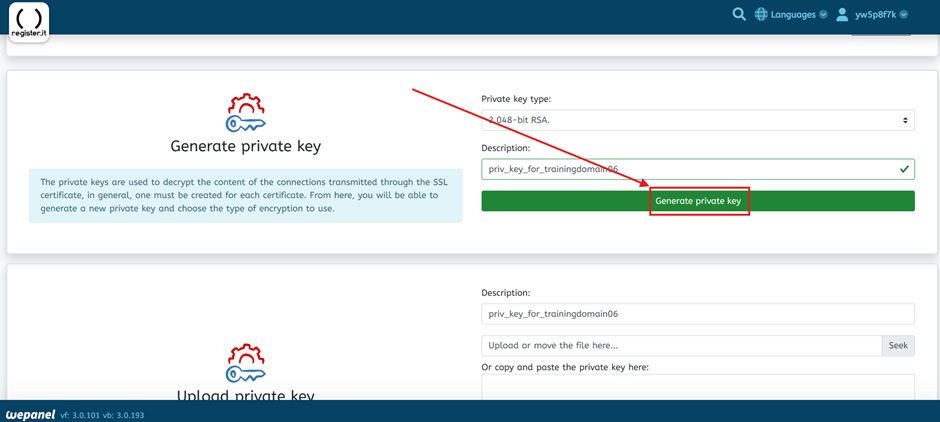
You will first need to generate a private key. Under Private key click on Manage.

Step Four
Scroll down to Generate private key. Here you can select the private key type and will need to give a description for your new private key. Your SSL issuer should be able to tell you which private key type is needed. Once you have entered this information click Generate private key.
Step Five
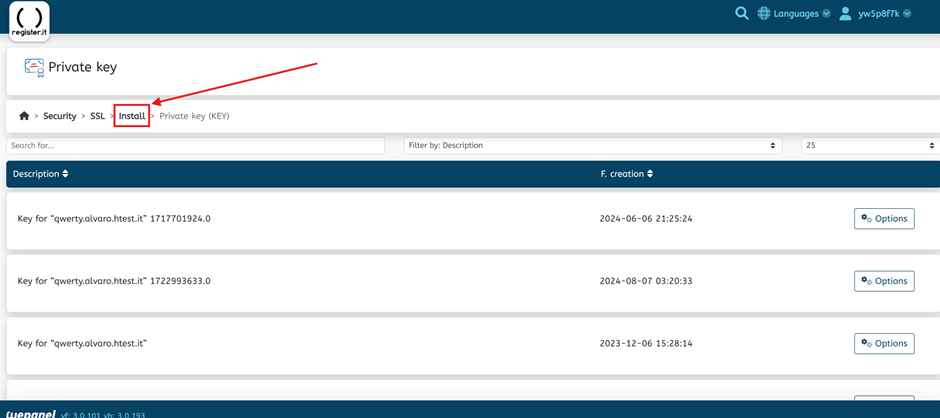
Click Install at the top of the screen to go back to the Advanced settings menu.
Step Six
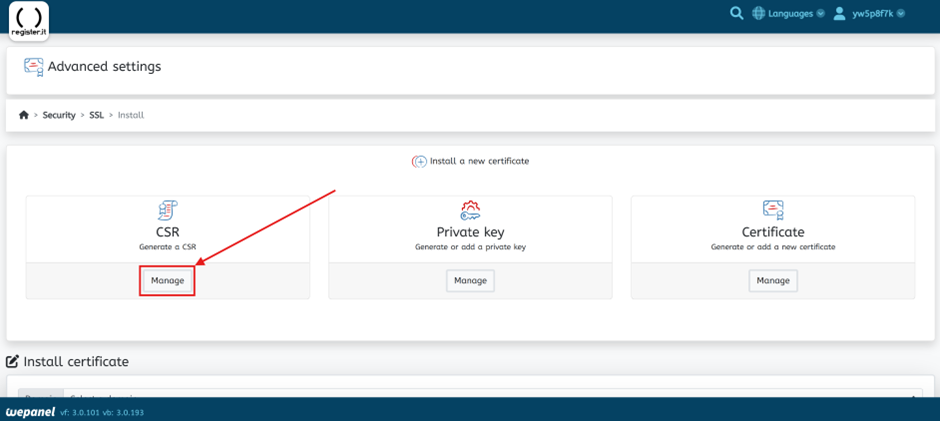
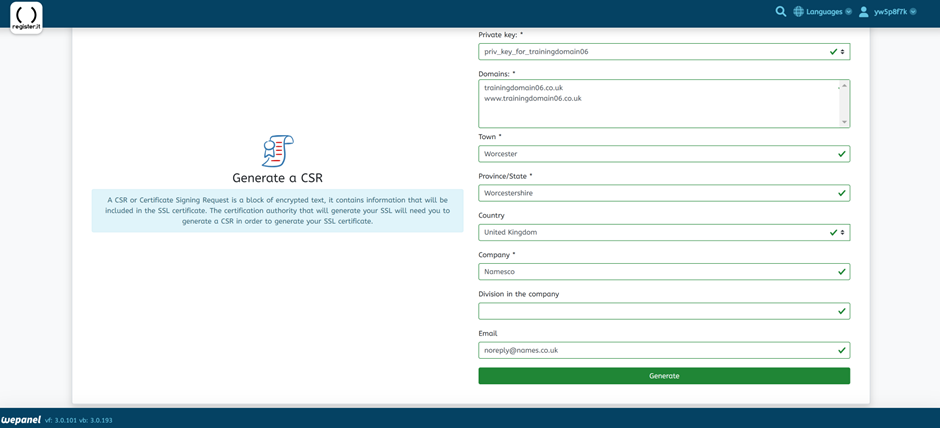
Now you will need to generate a CSR for the server. Click on Manage under CSR.
Step Seven
Scroll down to Generate a CSR. From the Private Key menu select the private key we generated earlier. In the Domains field enter your domain and any subdomains you are installing the SSL for – including the www subdomain for your website. Then click Generate.
Step Eight
You will then be greeted with the CSR generated! screen. You can click Download to download the .csr file you will need to provide to your SSL issuer. They will then provide you with a .crt file, or a certificate in text. To install the certificate, this time click Certificate.
Step Nine
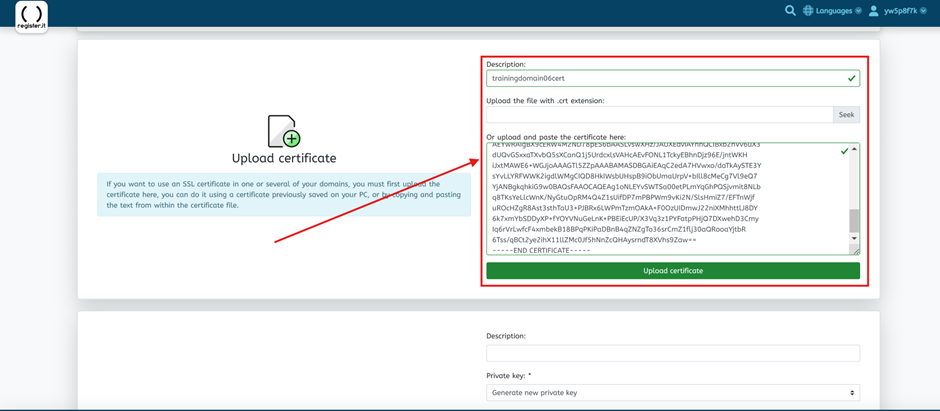
Scroll down to the Upload certificate section. Enter a description then either upload your .crt file or copy and paste the text into the text box. Then click Upload certificate.
If you have any further questions, simply raise a support request from within your Online Control Panel or call us on 0345 363 3634. Our Support team are here to help and ready to assist you with your enquiry.
For assistance raising a support request please follow the following guide.