How to setup an Exchange account in Mail on Windows 10
This article will guide you through configuring your email in Mail on Windows 10
Note: names.co.uk does not support third-party software or devices. For more information on Windows Mail, please visit https://support.microsoft.com
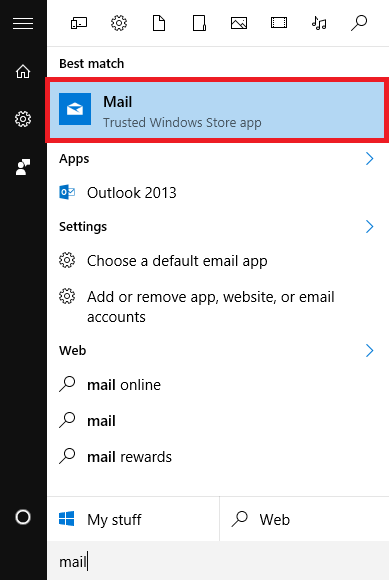
The first step is to go to your Windows Start menu and type Mail. Select the Mail option as shown below.
There are two ways in which you can add an account in Mail. They will be listed here as 1a and 1b.
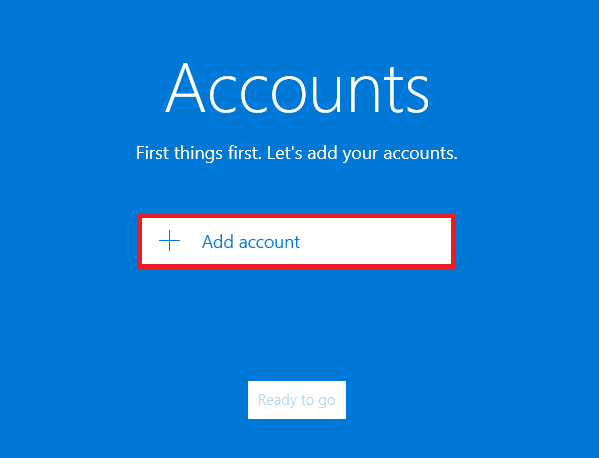
1a – If this is the first time you have loaded up Mail you will need to click on Get Started.
You will then need to click on Add Account.
If this is what you see, please scroll down to Section 2.
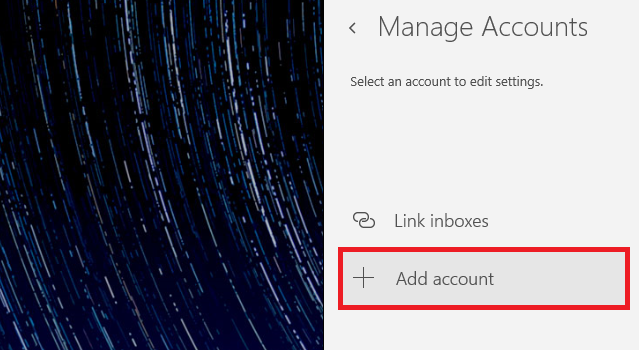
If you have already setup an account in Mail before, then you will need to do the following:
Click on the Accounts option at the top left corner.
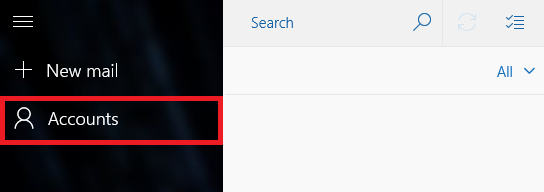
The Manage Accounts option will open up on the right-hand side. Click on Add Account.
Section 2
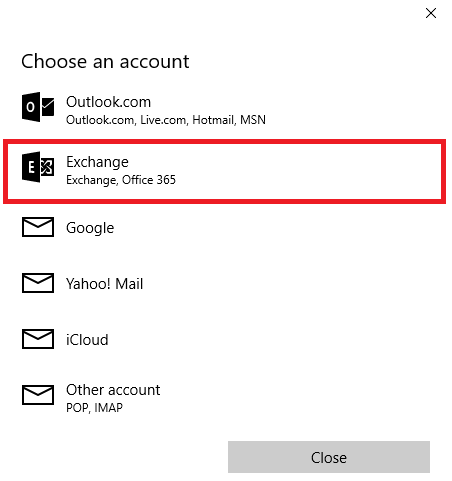
You will then have the option to select the account type.
Click on the option for Exchange.
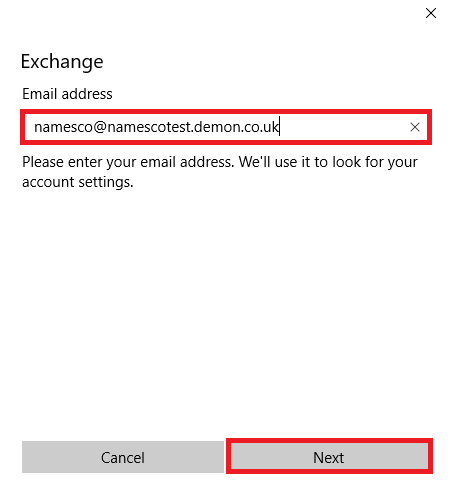
Type in your Email Address, and click Next.
Enter your Password for your email account, and click Sign In.

Next you will be asked if you want to link your email account to Windows.
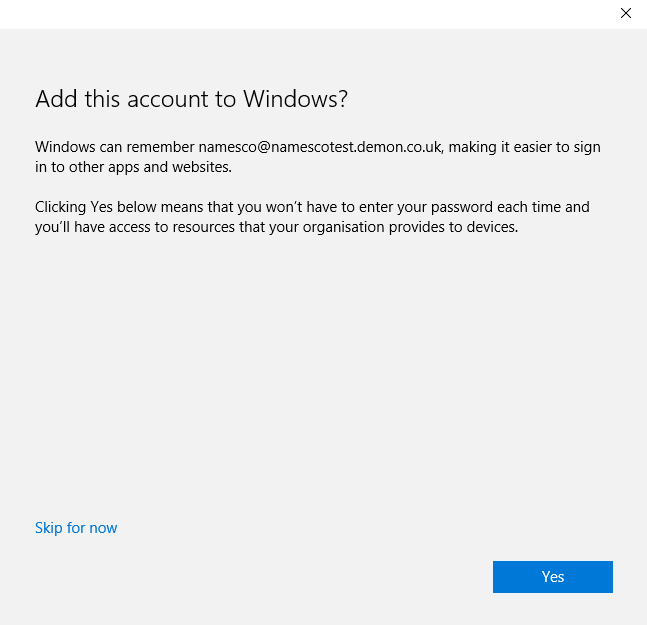
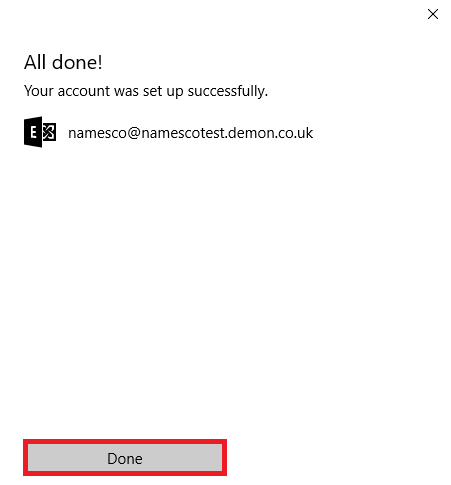
Once you have selected Yes or Skip for now, you will need to click Done to complete your setup.