Issues sending through Mac Mail
If you encounter issues sending through Mac Mail after adding your new exchange account please follow these steps to ensure your account is setup correctly.
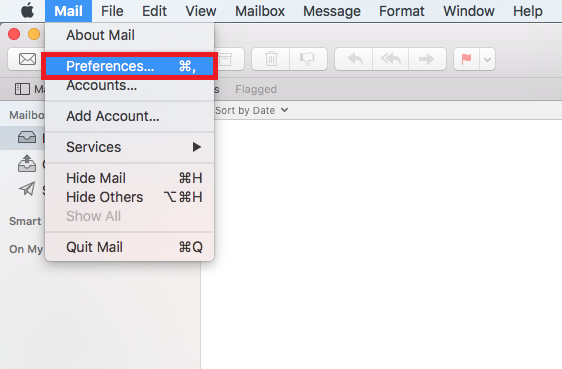
– In Mac Mail select “Mail” and “Preferences”
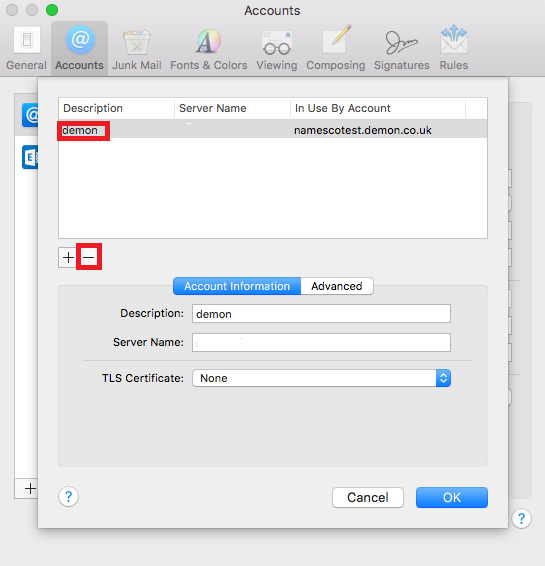
– Select “Accounts” and chose your old demon account. (This can be recognised as the incoming and outgoing servers will be demon.co.uk)
– Click Account Information and select “Edit SMTP Server List”

– Remove the old demon smtp server by clicking on the minus (-) sign.
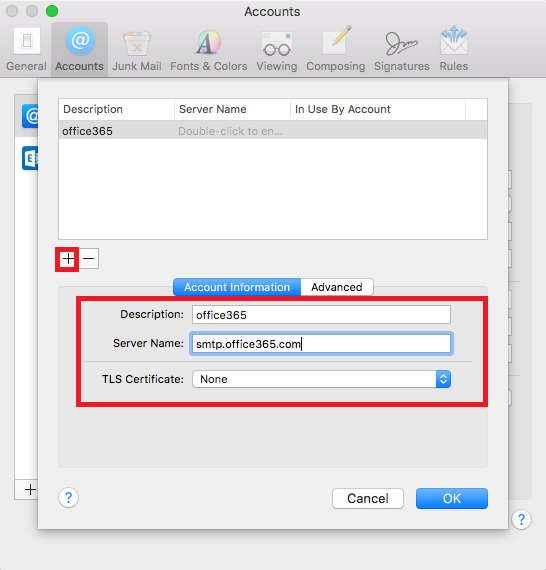
– Add a new SMTP server, by pressing the plus (+), with the following settings.
Description : office365
Server name : smtp.office365.com
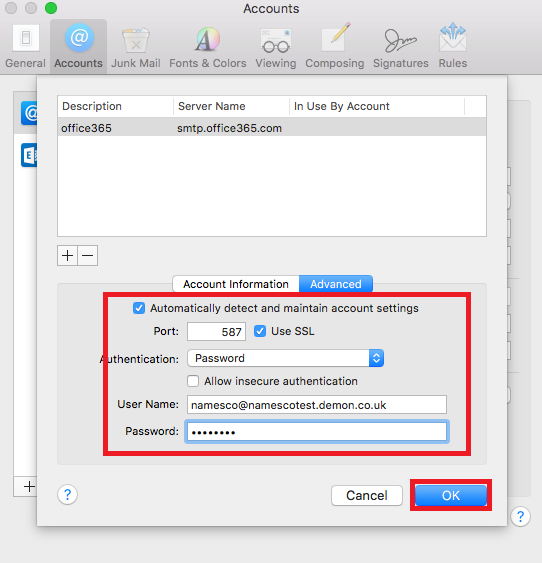
– Select “Advanced”
Tick “Automatically detect and maintain account settings”
Port : “587” with SSL ticked
Authentication “Password”
Username : your email address
Password : As set for your new account.
Click “OK”
Exit the settings and Save.
This should now send your emails successfully through your new Office365 account.