Using your Reseller Account
Introduction
We offer a reseller account with Names.co.uk which will allow you to rebrand or un-brand your Online Control Panel to allow your customers to login to their own individual accounts without it showing names.co.uk. The reseller package will also allow you to set up multiple customer accounts and assign permissions and package restrictions to each customer. This article will go through the features and how to use them through the Online Control Panel.
If you do not currently have the reseller package visit our Reseller package page on our website:
https://www.names.co.uk/web-hosting/reseller-hosting
Additionally call our Sales team on 0345 363 3632 who can guide you on choosing the best plan for you.
Table of Contents
- Accessing the Reseller area of your Online Control Panel
- Removing the Names.co.uk branding
- Adding and managing customers through your reseller package
- Creating and managing your hosting packages
Step One
Navigate to our website names.co.uk
Once on the website, choose “Log in” found on the top right-hand side of the page and log into your Online Control Panel. If you need assistance with this, please follow this guide.
Step Two
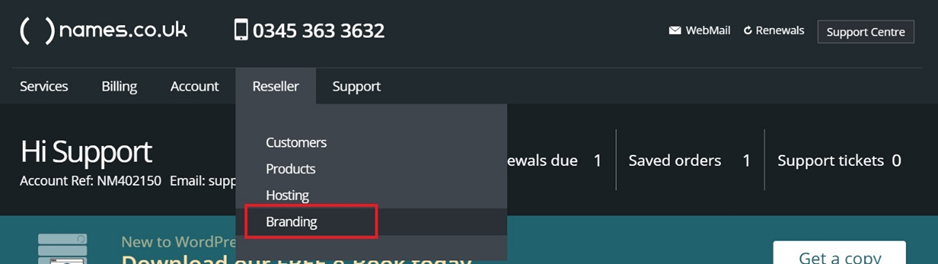
Once you have successfully logged into your Online Control Panel, navigate to the “Reseller” tab and from the drop-down menu choose “Branding”. This option only will show up if you have the Reseller package setup – if you do have the package and this is not showing, please call our customer support team on 0345 363 3632 and we can set this up for you.
Step Three
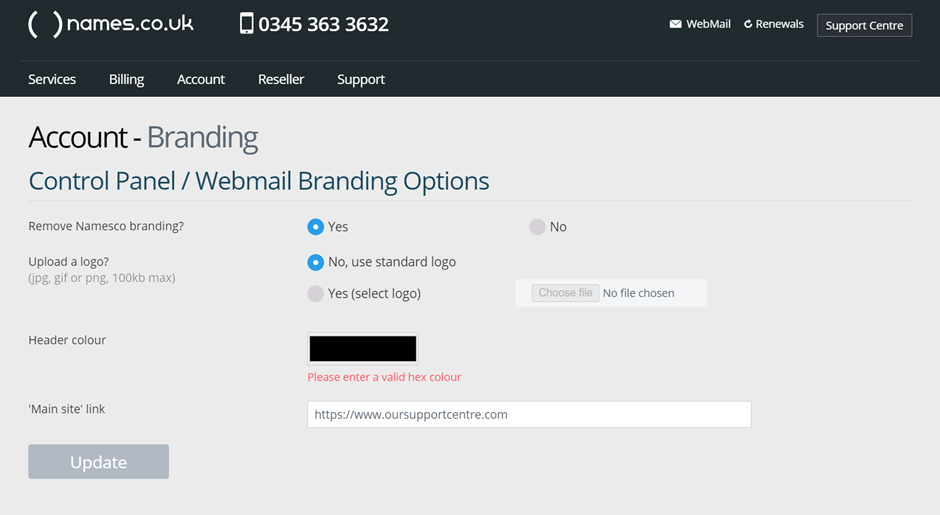
The Account – Branding page will now show up. From this page you will be able to remove the Namesco branding, upload a logo of your own, change the header colour and change the website that it redirects to when you click on the Logo. For more information on making these changes follow the guide here.
Step Four
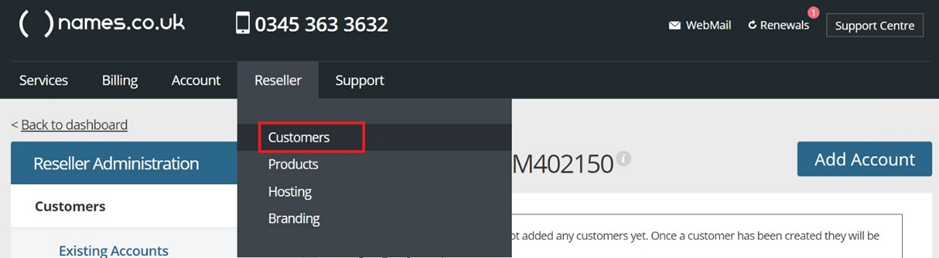
With the Reseller package you can add your customers directly through the Online Control Panel and this will give them their own individual account to login to and will only give them access to the domain name and hosting you have provided for them. To access this area, choose “Customers” under the “Reseller” tab.
Step Five
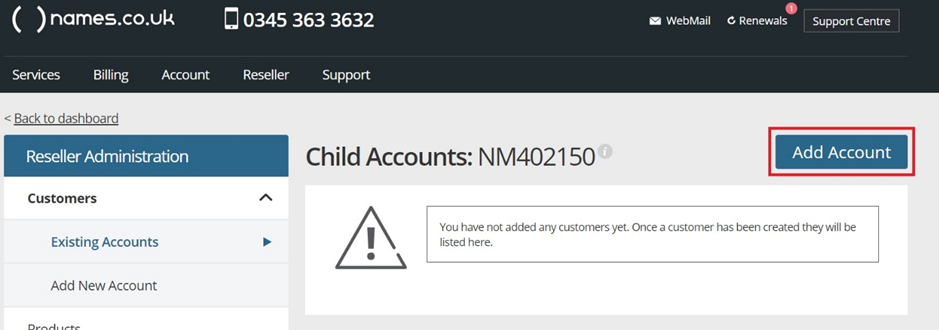
To add your customers account now choose the “Add Account” button on the right-hand side of the page which will open up a customer details form.
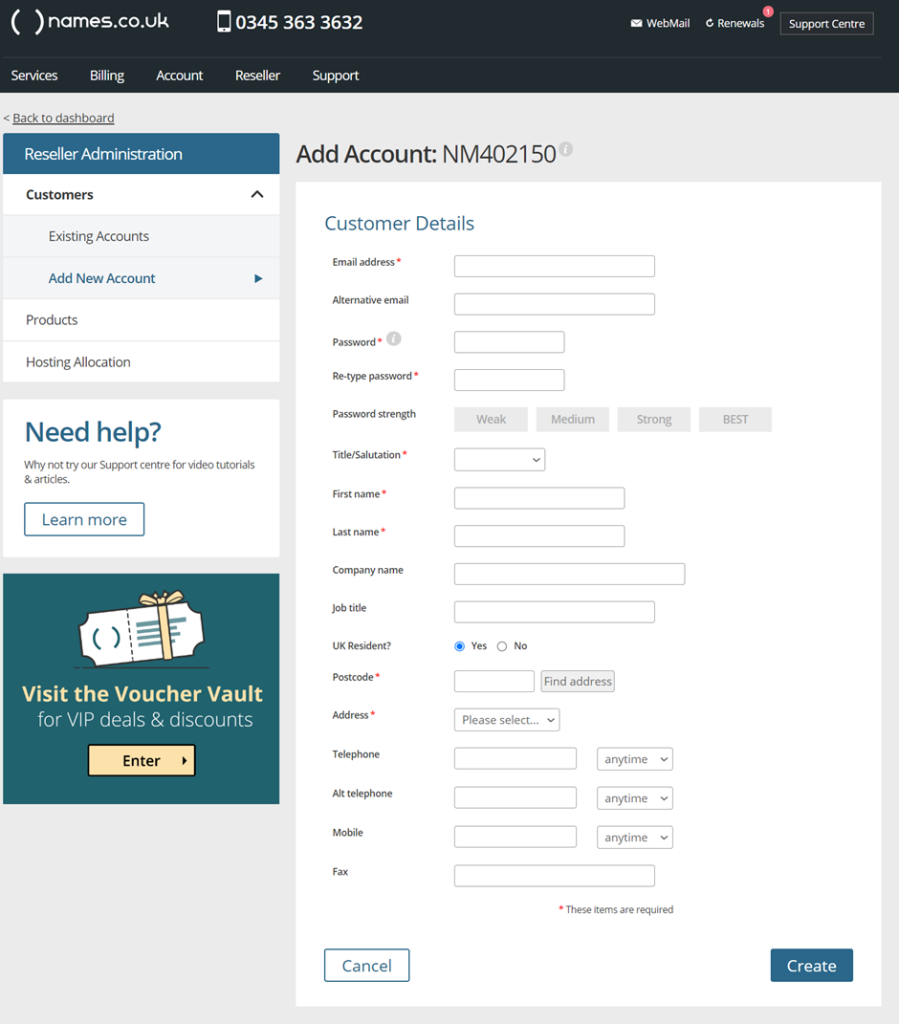
Step Six
The Add Account area will load now, you will need to fill in all the customer details in this form and when this has been filled in, choose “Create” at the bottom of the form.
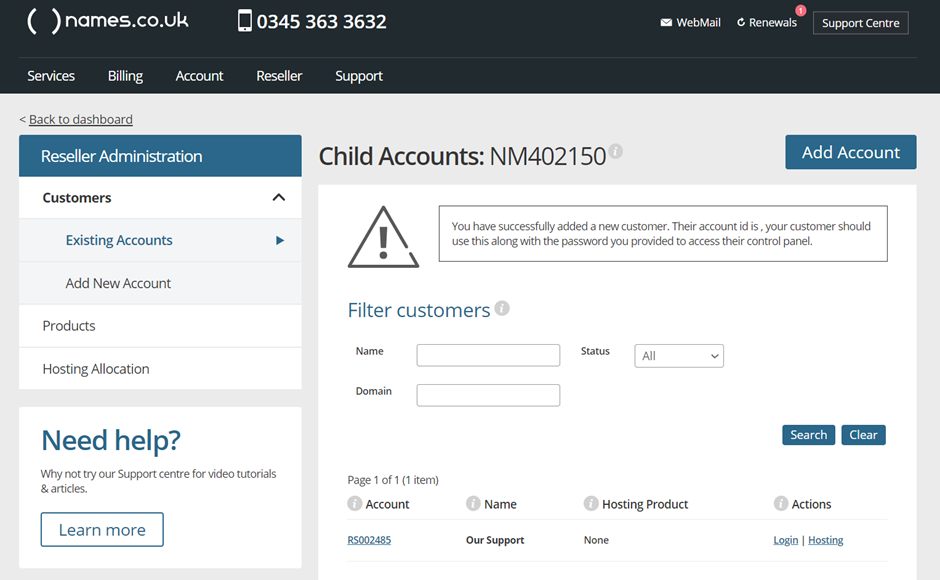
Step Seven
Once this form has been submitted it will divert you back to the “Customers” page where you will see the new account you have created with their unique account reference which will always start with RS followed by some numbers. Once added you can login to that account, link domain names and hosting packages to that customer. To add a hosting package for the first time, you’ll need to create a hosting plan which is covered in the next step.
Step Eight
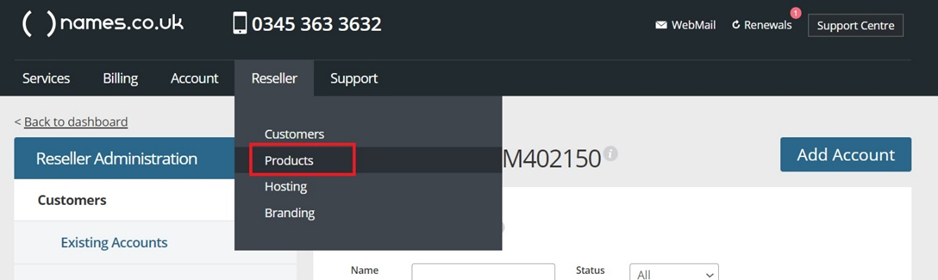
Now you’ve created your customers account, it’s time to add a hosting package. You’ll firstly need to navigate to “Products” which can be located under the “Reseller” tab.
Step Nine
From the Products page you can choose “Add Product” found on the left-hand side of the page.
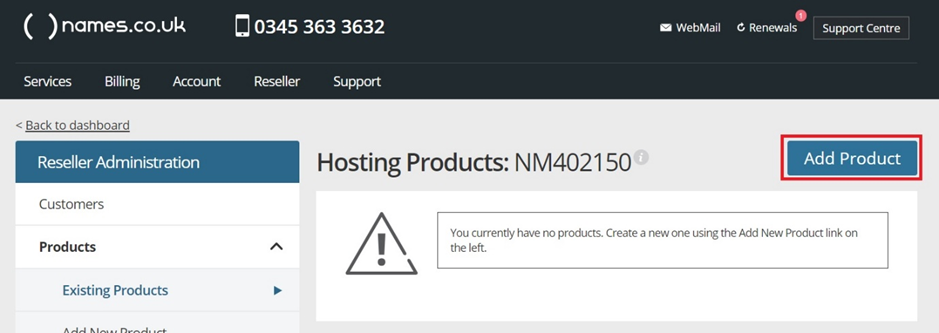
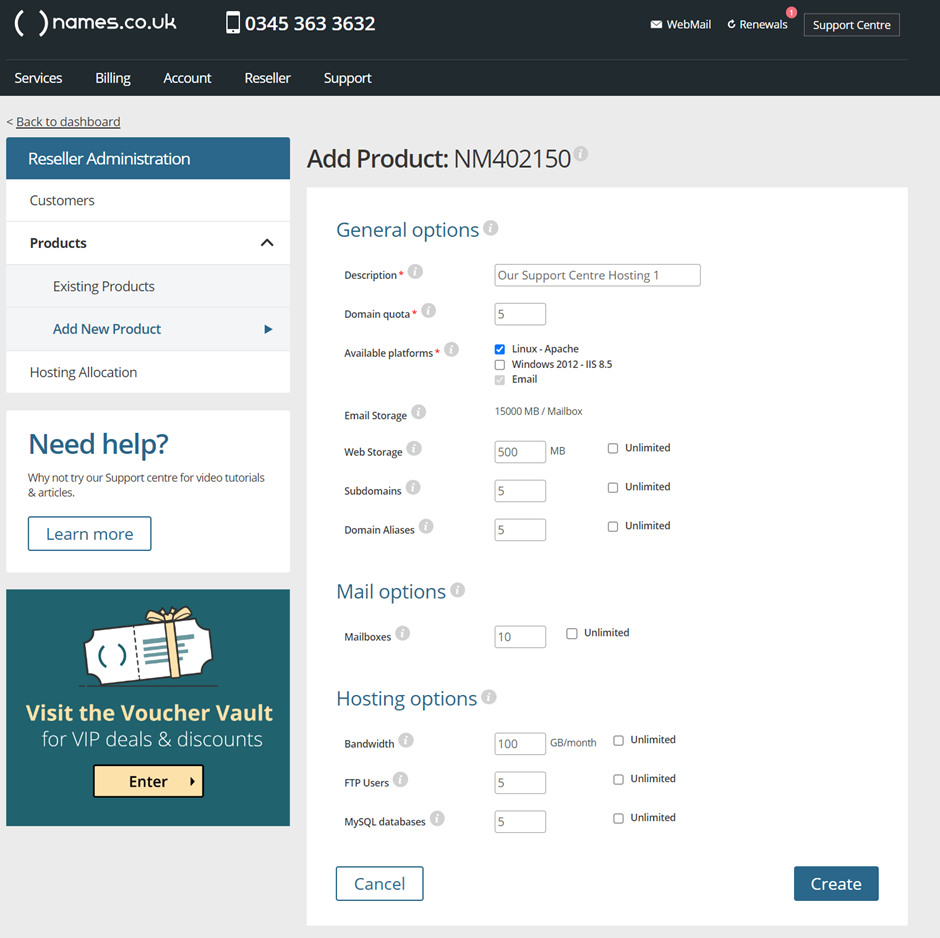
The “Add Product” page will load and allow you to choose the allocation you want to assign to this package. We recommend calling the name something unique so you know what features the package has. You can create multiple packages starting with a small quota and allocation and going to a larger package with higher allocation of resources. Once you have filled out the form, choose the “Create” button to create your new package.
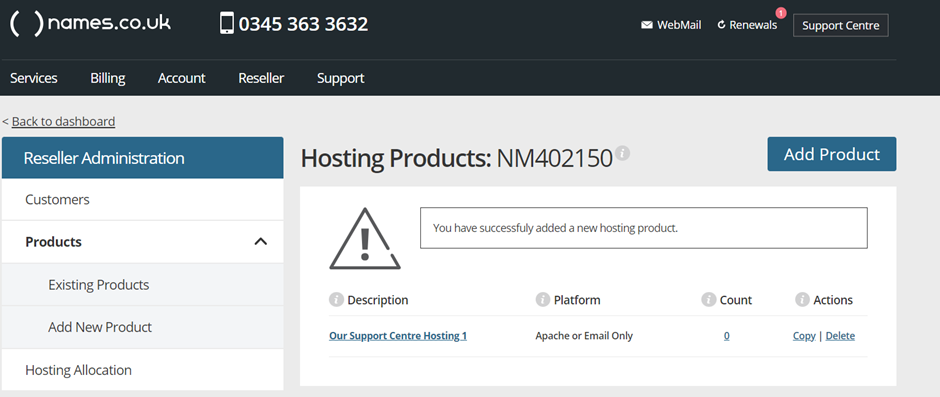
Once created you will see your new package is now showing under the “Products” Section.
Step Eleven
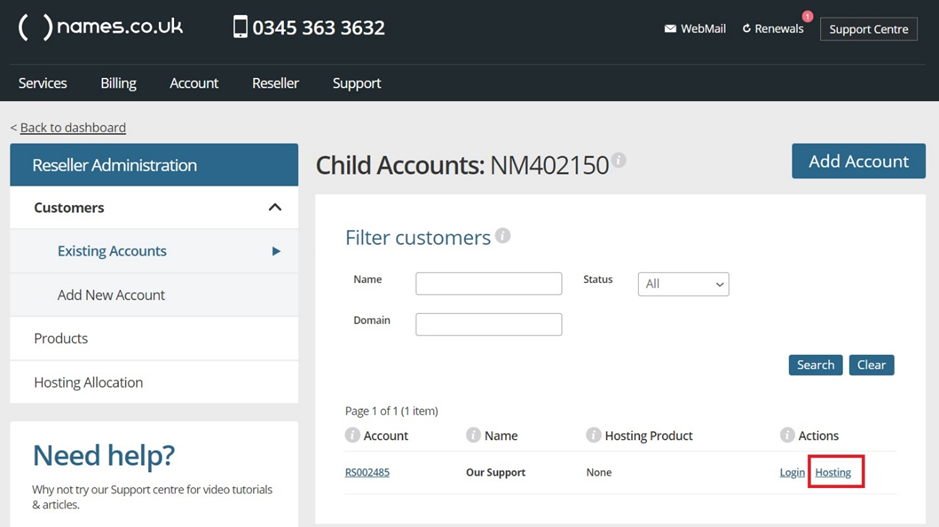
If you navigate back to “Customers” you can now choose “Hosting” which will allow you to assign the hosting plan you recently created to the new customer that has been setup.
Step Twelve
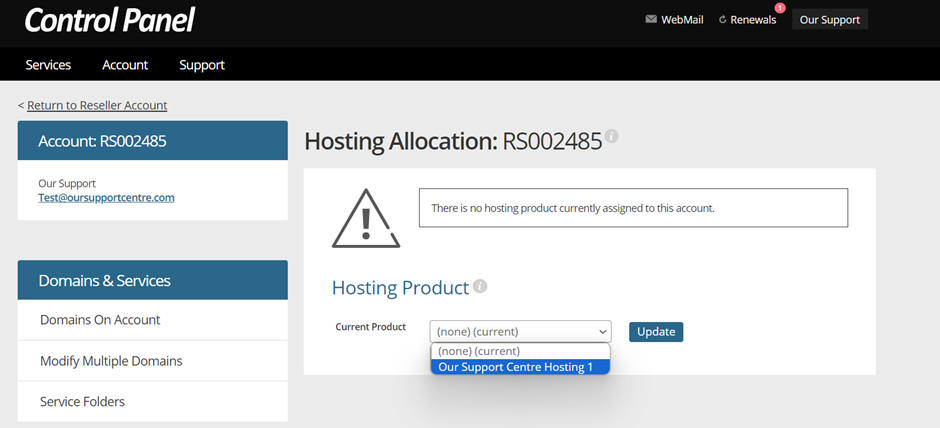
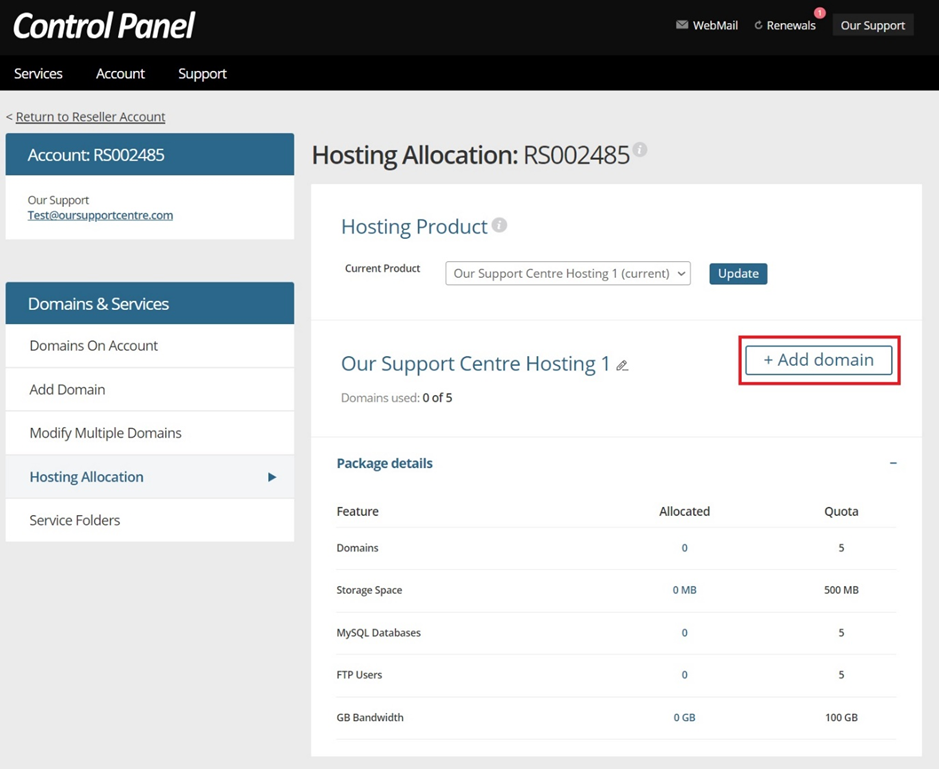
The “Hosting Allocation” page will now load allowing you to choose from the drop-down list to add the appropriate hosting package to the customer’s account. Choose “Update” once you have found the correct package.
Step Thirteen
At this stage you should now have your customers account created, and a hosting plan attached to that account, so the last stage is to add a domain name to link to both the account and also the hosting. To do this choose the “+Add domain” button and add the domain name to the form that loads.
When you have added their domain name to this form choose the “Save” option at the bottom of the page.

Step Fourteen
You should now have your customers account fully created, with a domain name and a hosting/email plan setup for them. The customer can now login to their own area by following the link below and signing in with their RS account number and the password that was created for them.
https://login.cplogin.co.uk/login
They can access the webmail service with the following link:
If you have any further questions, simply raise a support request from within your Online Control Panel or call us on 0345 363 3634. Our Support team are here to help and ready to assist you with your enquiry.
For assistance raising a support request please follow the following guide.